Thu Dec 19, 2019, 5:28 pm
Simplify3D Version 5.0 is finally here. With over 70 updates and important bug fixes.
Simplify3D customers received a development update via email.
Simplify3D (@Simplify3D) | Twitter
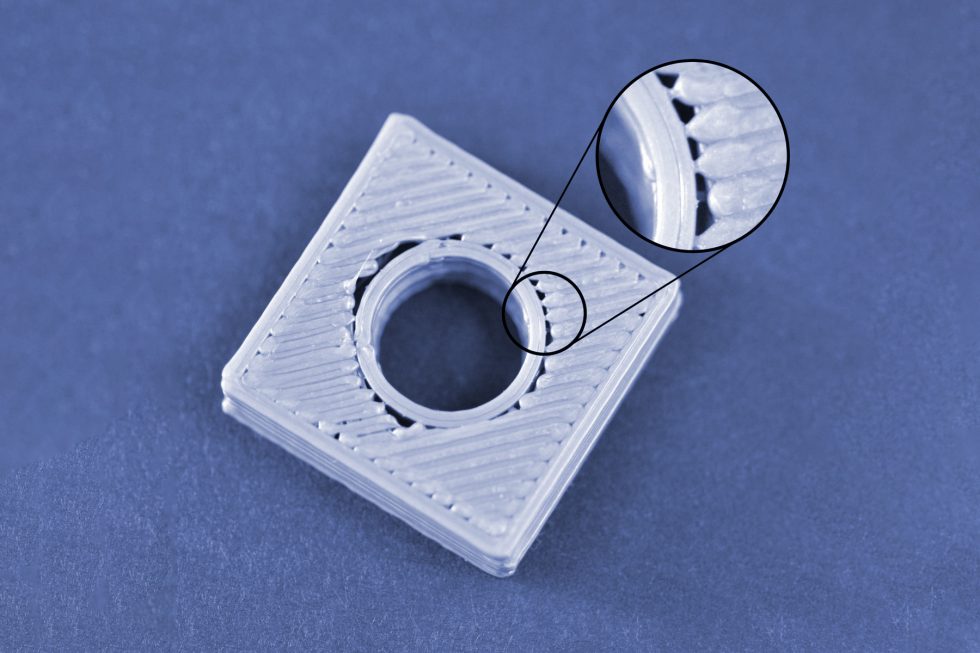
Gaps Between the Infill and Outline
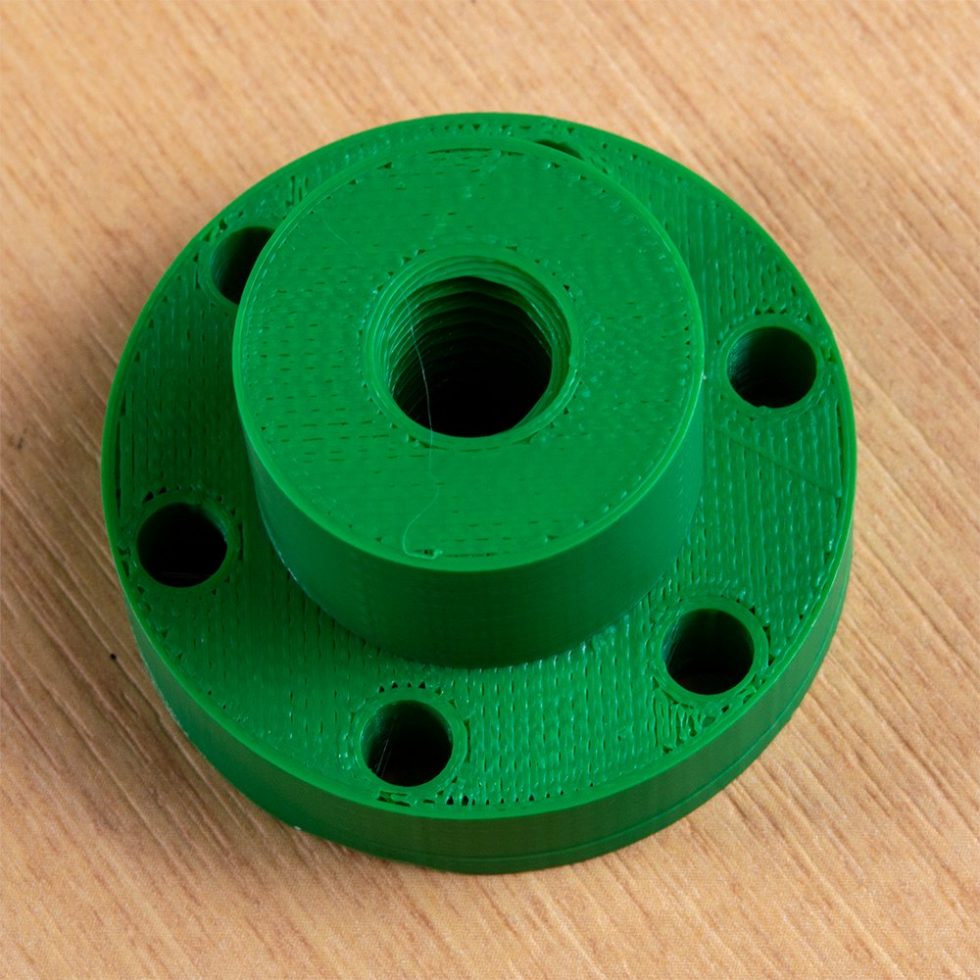
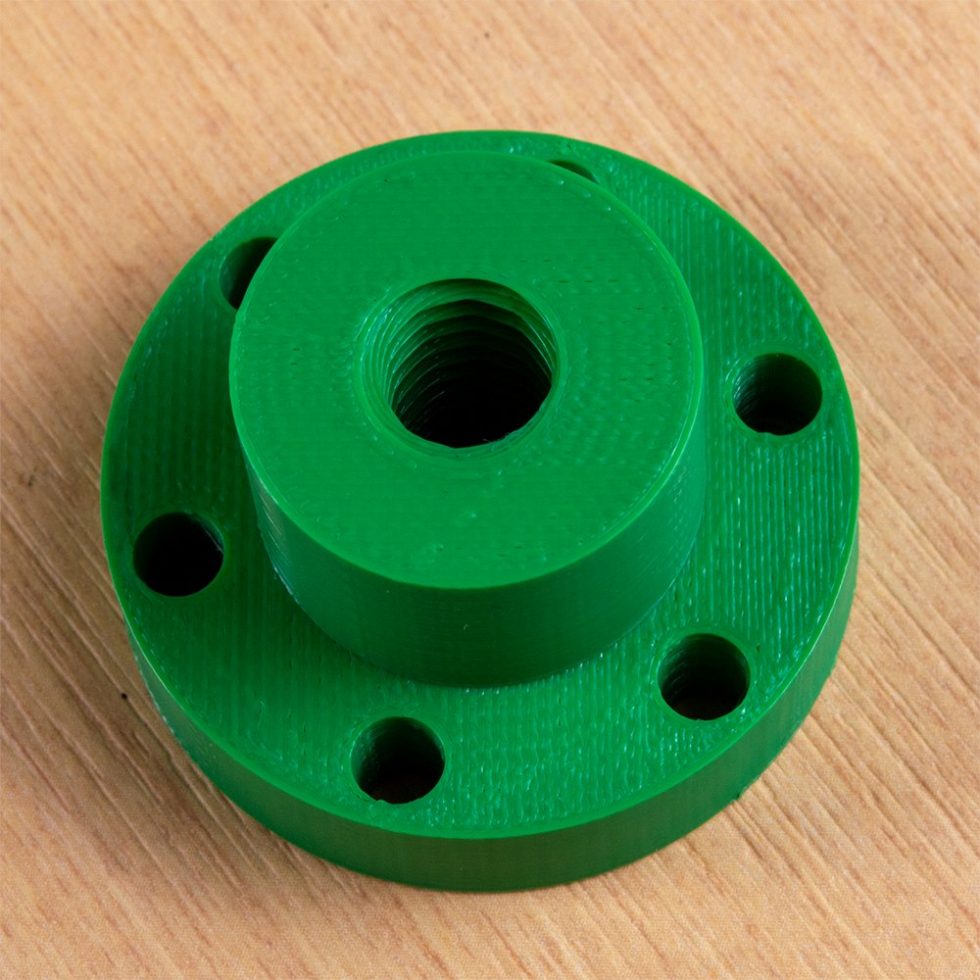
Each layer of a printed part is created using a perimeter outline and infill. The perimeter is very important as it holds the infill to make up the remainder of the shape. Infill typically uses high-speed printing settings. Because infill usually uses a different pattern than the outline of your part, it is important that these sections merge together forming a solid bond. If you see gaps between the perimeter outline and infill then there are several settings you may have to fix. Listed below are a few settings you may want to try.
Solutions
1. Increase outline overlap
Simplify3D has a setting to adjust the gap/bond between the perimeter outlines and the infill. This setting is called the “Outline overlap” and it determines how much of the infill will overlap with the outline to join the two sections together. You can find the Infill tab in the “Edit Process Settings” area. The setting is based on a percentage of your extrusion width so that it easily scales and adjusts for different nozzle sizes. For example, if you are using a 20% outline overlap, it means that the software will instruct the printer so that the infill overlaps with 20% of the innermost perimeter. This overlap helps to ensure a strong bond between the different bits. As an example, if you were using an outline overlap of 25% and got gaps, try increasing the value to 35% to see if the gaps between your perimeters and infill disappear.
2. Slow down printing speeds
Infill is generally printed much faster than outlines. However, if the infill is printed too fast, it will not have enough time to bond to the outline perimeters. If you have tried increasing the outline overlap, but you are still seeing gaps between your perimeters and infill, then you should try decreasing the print speed. To do this, click “Edit Process Settings” and select the Speeds tab. Adjust the “Default Printing Speed”, which controls the speed of any movements where the extruder head is actively extruding plastic. For example, if you were previously printing at 3600 mm/min (60 mm/s), try decreasing that value by half to see if the gaps between your perimeters and infill disappear. If the gaps can no longer be seen at the lower speed, gradually increase the default printing speed until you find the best speed for your project.
3. Adjust the extruder head temperature
If the material is not set to the right temperature you might not be getting the best results. Try adjusting the extruder’s heat setting to either melt the material together or reduce problems caused by cooking the material.